
Tour Widgets let you embed TourRadar tour recommendations directly on your own website, so your customers can see relevant tours.
Every tour a customer clicks into from the widget opens on a page that carries your own branding — your logo and contact details are shown alongside the tour, so customers always know they're still dealing with you.
Why use it?
-
More bookings, less friction. Customers see tour recommendations right on your site, shortening the path from browsing to booking.
-
You stay the point of contact. Every tour page shown through the widget carries your logo and contact details.
-
You keep the commission. Whether a customer books instantly online or contacts you directly, the booking is tracked back to your account and you earn commission either way.
-
No developer needed. It's a simple copy-paste embed code — no design or technical skills required.
How to set up a widget
-
Log in to your Partner Portal and go to Branding & Marketing > Widgets.
-
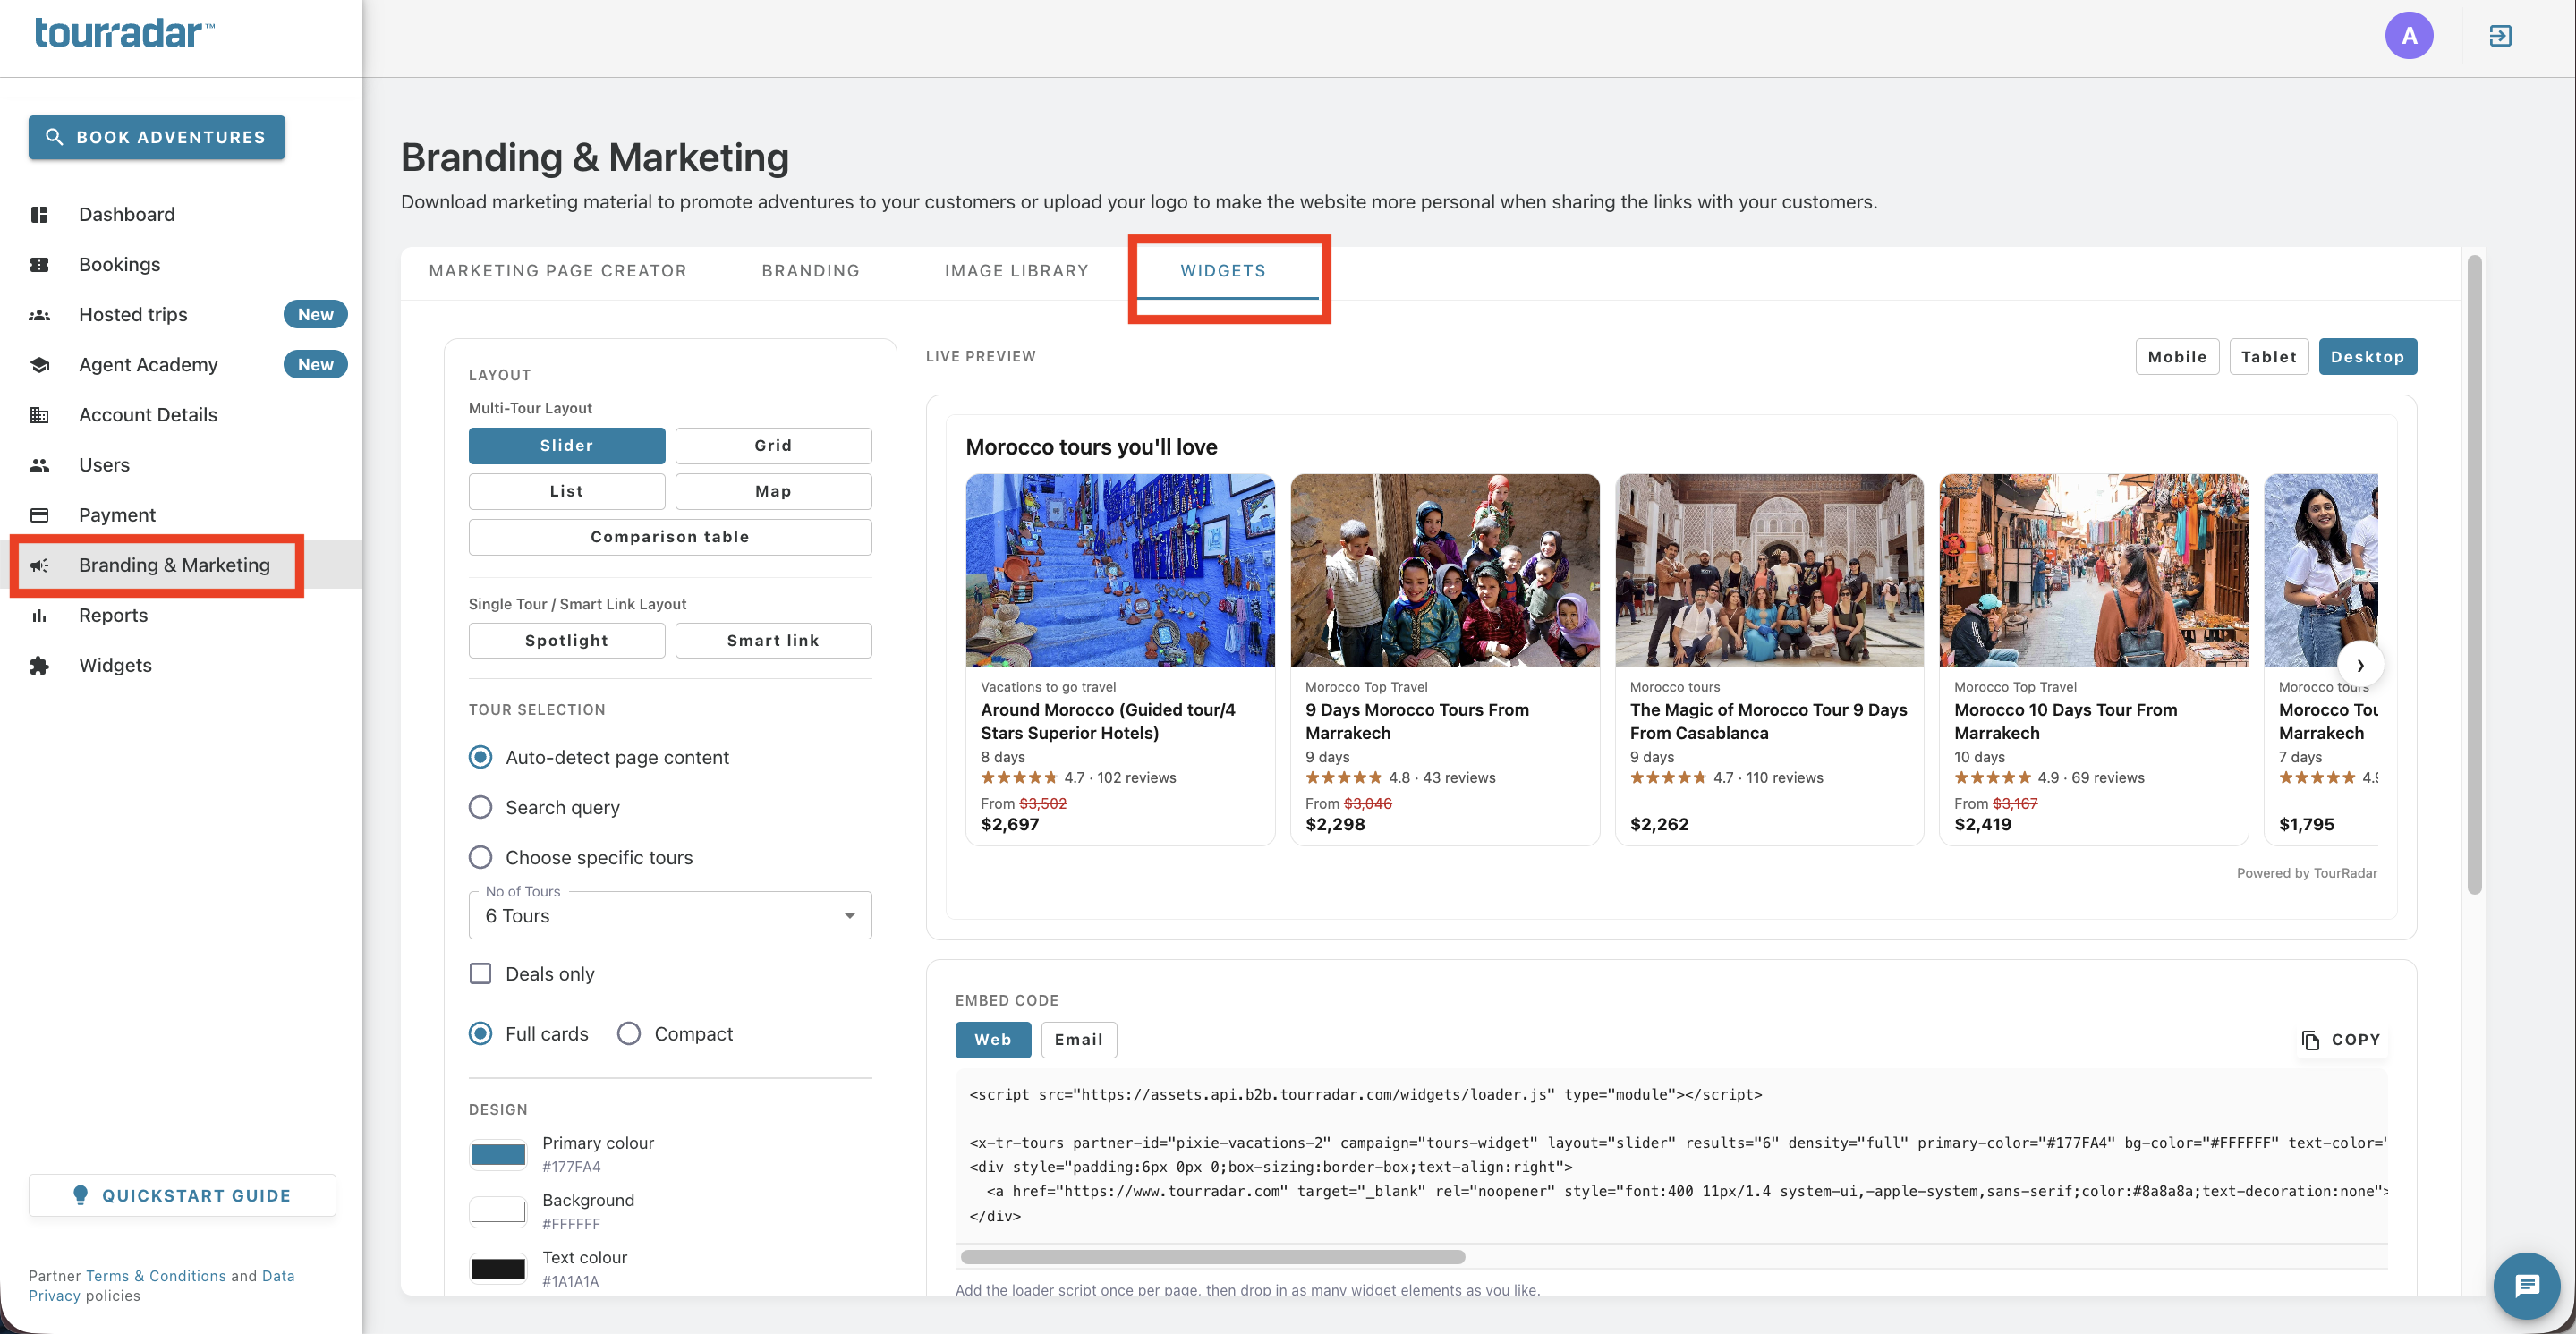
Configure your widget — choose a layout, select which tours to show, and match the design to your branding.
-
Copy the generated embed code and paste it into your website or into your email template.
-
Visitors browsing your site see the widget and can click through to a branded tour page.
-
Any resulting booking — whether completed online or through you directly — is credited to your account, and you earn commission.
Customization options
-
Layout: Slider, Grid, List, or Map for showing multiple tours; Spotlight or Smart Link for a single tour.
-
Tour selection: Let the widget auto-detect relevant tours based on the page it's embedded on, or choose them yourself. You can also set how many tours are shown and pick a full or compact card style.
-
Design: Match your primary colour, background colour, text colour, font, and corner style to your own website.
-
Currency: Auto-detect based on the visitor's location, or set a fixed currency.
-
Copy: Customize the widget title and button label (for example, "View tour").
-
Comparison table: Let customers compare key details across several tours side by side, including price, rating, duration, and what's included.
-
Search by query: Enter a destination, category, or keyword to show relevant tours.
-
Show deals only: Filter your widget so it only shows discounted tours. This is useful during sales and promotional periods.
Using widgets in emails
You can create an email-friendly version of your widget to feature tours directly in your marketing emails. There are a few differences from website widgets:
-
Website widgets are dynamic. They update automatically, so prices and availability always stay current.
-
Email widgets are static. Prices shown in an email reflect the pricing available when you created the widget.
You'll need an HTML-friendly platform. Embedding a widget in an email requires a CRM or email marketing platform that supports HTML templates. Standard email clients such as Gmail may not support this.
.png?cb=e3a4aeada372b24b21c533003500b339)